
Free How to Make Ornies and Shelf Sitters — Hearts, Stars, and Piggies — Patterns and I
- Silver RavenWolf
- Jan 22, 2013
- 6 min read

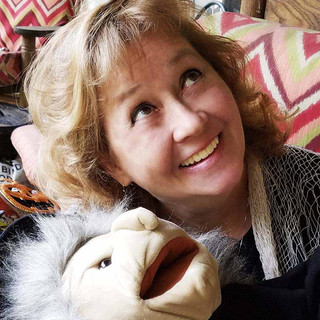
Mortimer
The Doll Whisperer — How to Make Ornies and Shelf Sitters — Hearts, Stars, and Piggies — Patterns and Instructions Included
by Silver RavenWolf 2013
“Pssst! Hey, Lady!”
I looked around my craft room. Just me, the dog who does not have command of the English language at this time, and inanimate stuff.
“Yeah! You! Ladeeee! Over here! Whoo-hooo!”
I dropped my head. Looked from right to left, and sighed. It was happening again. They just won’t go away. No matter how hard I try? They find me.
I tried to ignore them. Act like they aren’t there. You know, behave all normal like? Hasn’t worked.
You’ve heard of the ghost whisperer? Mediums? People who talk to the dead? Me? Not so lucky. I don’t hear people with unfinished business — of course not! No, no — I’m plagued by something far worse! The spirits of stuffed animals and dolls that want to be born! They pester you! Wake you up at night. Even throw tantrums!
They do.
Honest.
No, I am not on meds.
Maybe I should be.
Sometimes it is just a voice, and other times I see the whole package — regardless, the energy demands to be heard. I have physical responses on occasion — fingers itch, can’t sleep, see a variety of interesting patterns and shapes in nature… it is never exactly the same. It started with my dolls, and it hasn’t stopped. Now, there sat in front of me just as big as you please — a pig.
“Draw me.”
“No.”
“Come on, the holidays are over, you have the whole year ahead of you. You know you want to make me. Yes, you do. I should be simple, easy for others to create. The pencils are in the drawer over there and your husband just bought you a new tablet of graph paper. You wanna do it! Create me!”
“I have other things to do.”
“Liar!”
“Okay, I have other things I would like to do today.”
“No you don’t. Just think of all the pleasure folks will have if you design me. I want to be primitive. Grunged. I prefer cinnamon and vanilla. Oh! And I want a scarf of some kind. Something simple. Not too pretentious.”
“Go away!”
“Make me and I will. By the way, my stuffing should include some magickal herbs. I’m partial to patchouli. I am a good fortune piggy, you know, so chocolate mint would also be a plus. Today is a very good day astrologically. Waxing moon. Moon in Taurus. But, if you don’t get to work, you’ll miss the window.”
“Too bad for you.” I turned away from the piggy and pulled out a book.
Tapping.
Tapping.
“What are you doing?” I asked.
“I am tapping my hoof. I’m waiting. That’s what you are going to do today? Bury your nose in a book?”
I didn’t look up. “I borrowed this book eight months ago from a friend and never got to it. I’m sure he’s not happy I still have it.”
Snorting. “Do you have a tissue?”
I frowned and continued to stare at the book. “Why?”
“It is five below outside. My snout is running.”
I reached over and grabbed a tissue. “Here!”
“Thank you,” he said, as I watched the tissue float across the room. He snatched it out of the air and blew.
“Yuck,” I said, and went back to reading my book. Except, of course, I couldn’t concentrate. I faked it.
“Mortimer,” he said quietly.
Now you’ve done it, I thought. You’ve given me a name. I’ll have no peace, no rest, no sleep until good old Mortimer over there joined his energy with the physical object I create. Things like hearts, stars – basic shapes? They don’t really talk. They are more like colors and feelings. Its the dolls and the animals that pester you.
Like now. “Fine!” I said, slapping the book shut and putting it back on the shelf. This will not make my friend the least bit happy. Mortimer, on the other hand, was jumping for joy.
“I’ll get the pencil!” he said.
“You do that.”
The remainder of this article is a pictorial presentation of how I make the traditional, primitive stuffed ornies and shelf sitters, followed by the patterns for a star, a heart, and a pig like Mortimer (who is currently waiting for his owner on Etsy). I also have patterns for cats, sheep, and bats, which you will see in a later article. Please note that you can also use my patterns for felt ornies, blanket stitch to close. Kids love the felt objects.
To make my primitive objects, you will need standard supplies:
Cotton Muslin Cotton Thread Poly Stuffing Scissors Pencil (to trace pattern) Instant coffee (four tablespoons), 1 cup of water, 1 ounce of vanilla extract, 1 tablespoon of brown sugar, and cinnamon (blend together in mixing cup) — You will also need pumpkin pie spice to rub on the ornies mixed with nutmeg An oven — 180 degrees — most are done in 20 minutes Paint brush Acrylic Paint (your color choice) Sand paper (I prefer rough grit, but you need to be careful, you may prefer a lighter grit) Any embellishments you wish to add
Here are the photos!

Design your pattern. I use standard graph paper and a pencil.

Pin your pattern to muslin and cut out. Since you will be grunging, you can draw right on the muslin with the pencil if you like.

Cut two — one for front and one for back.

You can press your cut pieces if you like; however, the painting grunging process will take out the wrinkles. I press only if I feel the wrinkles will interfere with the sewing process.

Gone are the days when you must have a sewing line and a cutting line. Many folks now just draw the sewing line right on the fabric with a pencil, and then cut the square from the fabric. After the star is sewn you can nicely cut the seam allowance you want. This is a lot easier than trying to pin two shapes exactly together, keeping edges even before sewing.

Sew pieces by machine or by hand, leaving at least a 1/2 inch opening so that you can turn the shape inside out. As I stuff very firm, I usually sew the seams twice. I use a 1/4 inch seam allowance. If I think I may have trouble getting it right, I will draw that 1/4 inch allowance directly onto the material with a pencil before sewing.

Trim seams to 1/8 inch before turning the shape. Pinking shears are great for this as the little teeth allow the material to give while stuffing. If you don’t have pinking shears, make small slits around curves (not too close to stitching) to let the material give.

Turn your shape right side out.

For a smoother shape, tear your stuffing into tiny bits before shoving into shape. I prefer tightly packed shapes — be prepared to use more stuffing than you anticipated! Begin stuffing the edges furthermost away from the opening first.

Dried herbs and spices make the shape, doll, or animal more aromatic and more magickal! Choose herbs and spices that match your intent. You don’t need to insert a lot. Just a little will do. Objects show in picture are to give you an idea of what you can choose. Large pieces will give you problems when sanding later, so break up herbs and spices into very small bits and bury into shape. You can also add small slips of paper dressed with magickal oil and printed with magickal sigils to make the ornie full of enchantment!

Using tiny stiches, close object with needle and thread.

Paint shape with acrylic paint. For the hearts, I used a combination of colors. Allow to dry completely before your next step.

Be careful when sanding. If you rub too hard, you can create holes in your shape. A little fraying is fine, adds to the prim texture; but, too much and you will ruin your piece.

Ingredients for grunging mixture can include — 1 cup of water, four tablespoons of instant coffee, one tablespoon of brown sugar, one ounce of vanilla extract (imitation will do), and cinnamon. I mix mine in a jelly jar, then heat in the microwave for two minutes. After it cools, I use it to paint over the sanded shapes. Mixture can be stored in the refrigerator.

I usually make six shapes at one time. The jar to the right holds the grunging mixture. Once the paint is dry, and you have sanded the shape, paint with your grunging mixture.

Rub pumpkin pie spice mixed with nutmeg (or cloves) onto wet shapes. You can use a lot, or just a little. I like to be very generous rubbing in the spices. Get your hands dirty! Now, place in oven at 180 degrees and bake for at least twenty minutes or until completely dry. Don’t forget and let them in too long — they can burn.

I line my cookie sheet with tin foil for easier clean up. Here are stars ready for baking!

You can add embellishments either by sewing them on, or by using something like Liquid Stitch as shown here.

Finished hearts. Don’t worry that you can see the closure seam — primitive means just that!

Primitive stars.

Empower your finished product to match your desire. Then, place anywhere in your home or office to let a little magick in!
Here are the patterns!

Makes a 3.5 x 3 inch ornie heart. Can also be used for felt projects.

This pattern makes a six inch star. Can also be used for felt projects.

Mortimer the Pig. Be sure to cut four ears and two pig pieces.
Thank you so much for visiting! Mortimer is asking for a cup of hot tea. Gotta go!
Peace with the Gods Peace with Nature Peace Within.


Comments